


USE CASES
Sign with Microsoft Excel
Step 1: Open the document to be signed
- Open Microsoft Excel.
- Create a new file or open an existing file to sign.
Step 2: Select File → Info.
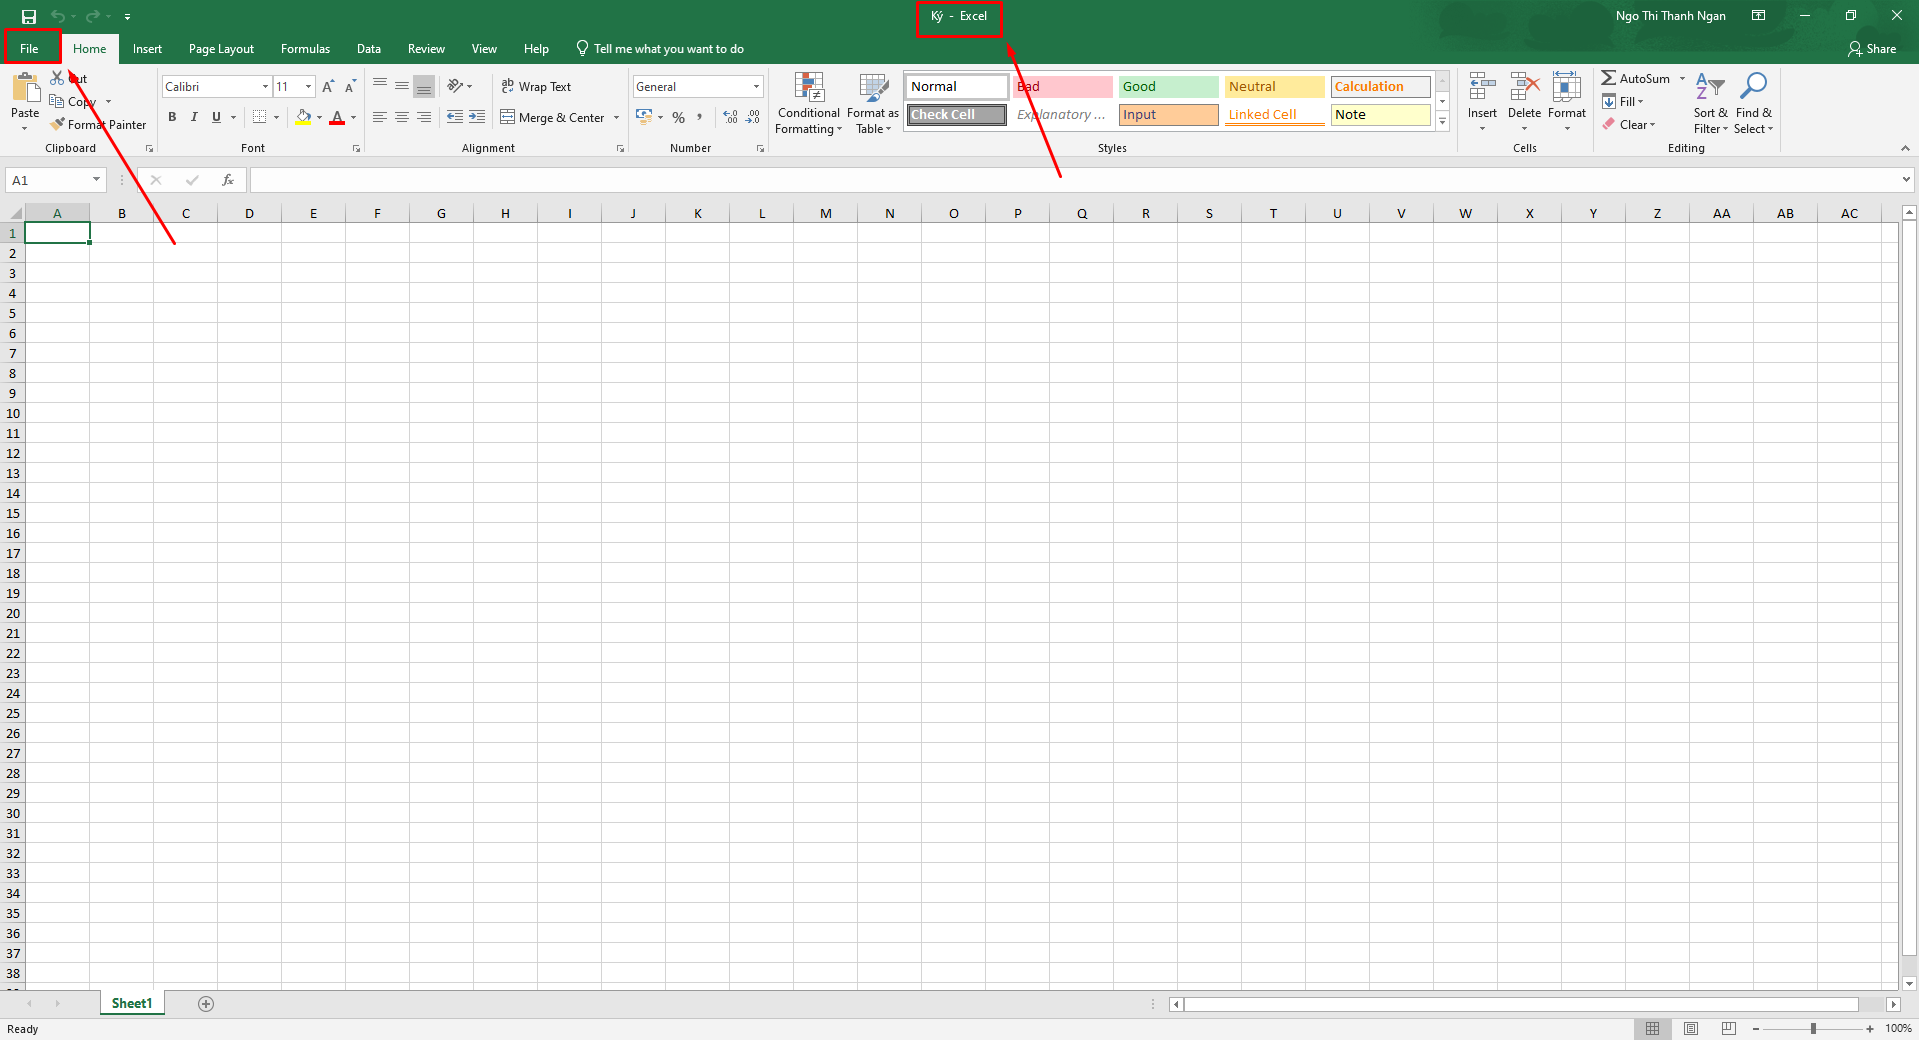
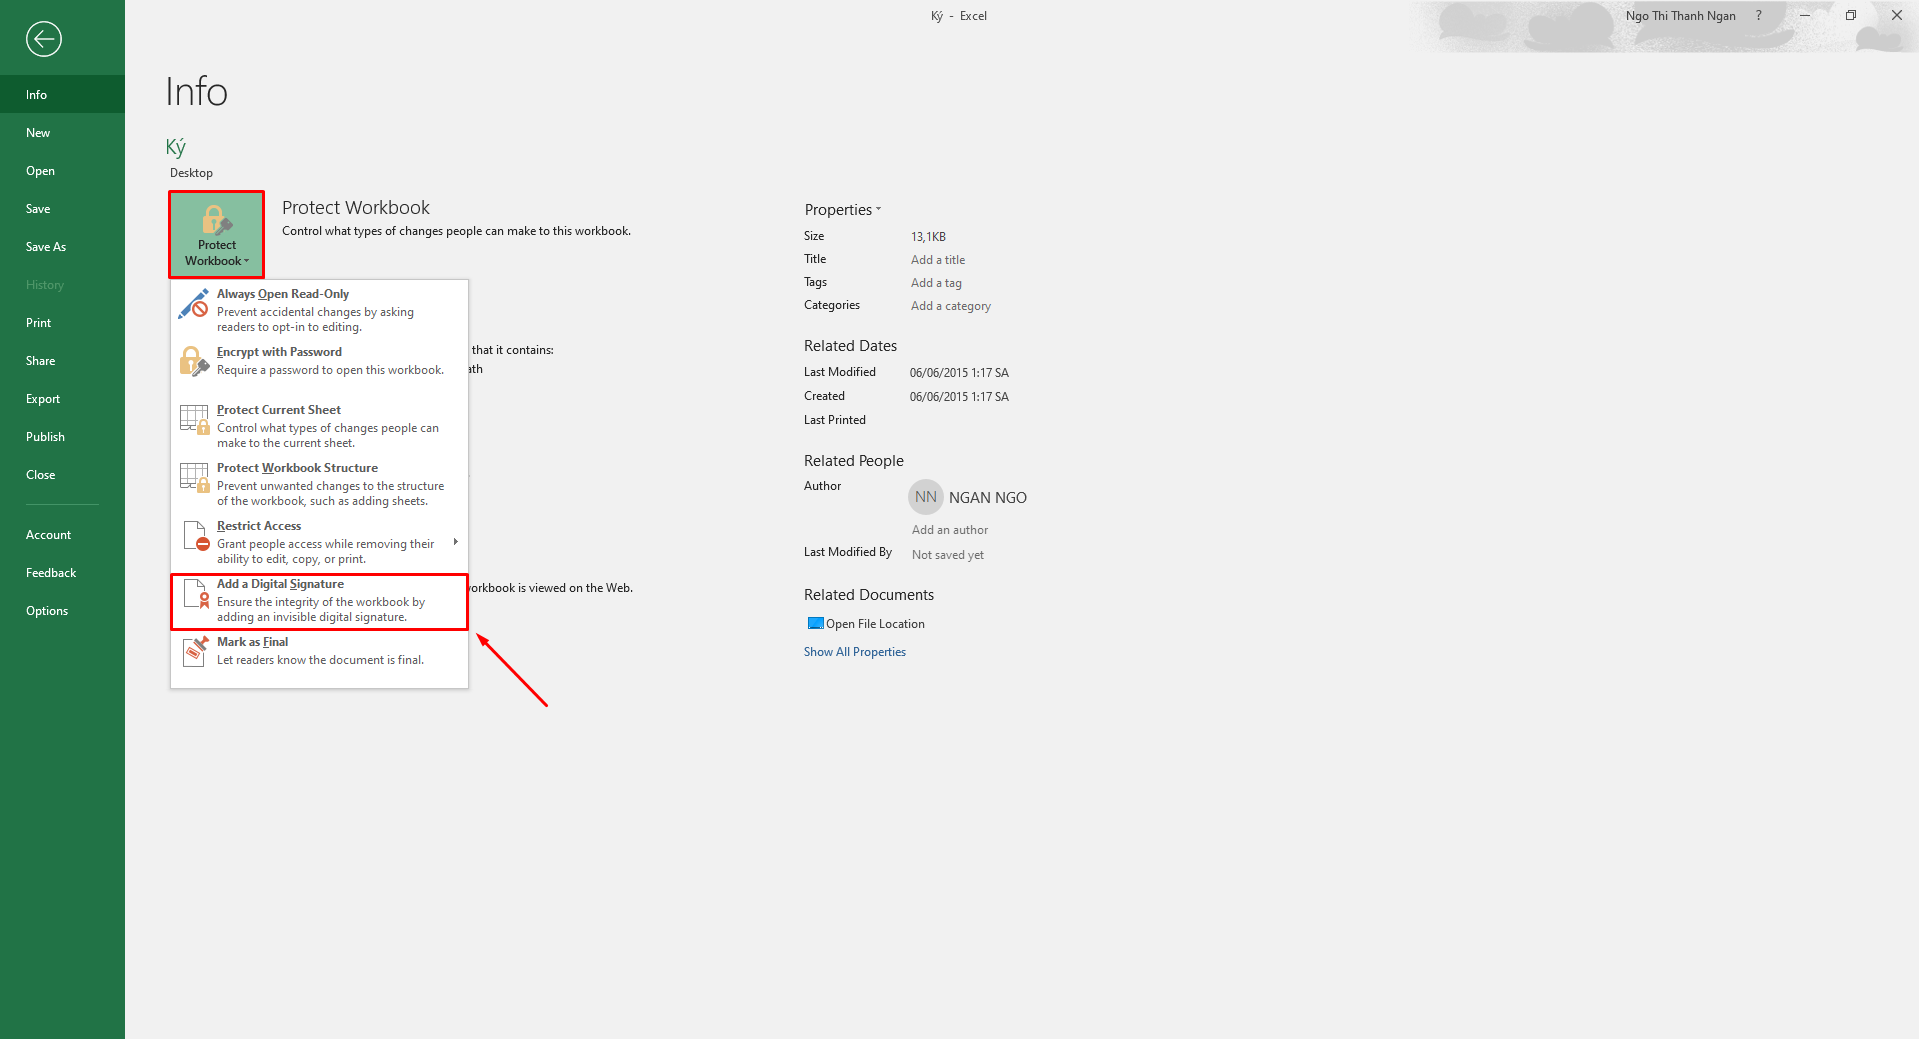
Step 3: Select Protect Workbook.
Step 4: Select Add a Digital Signature.
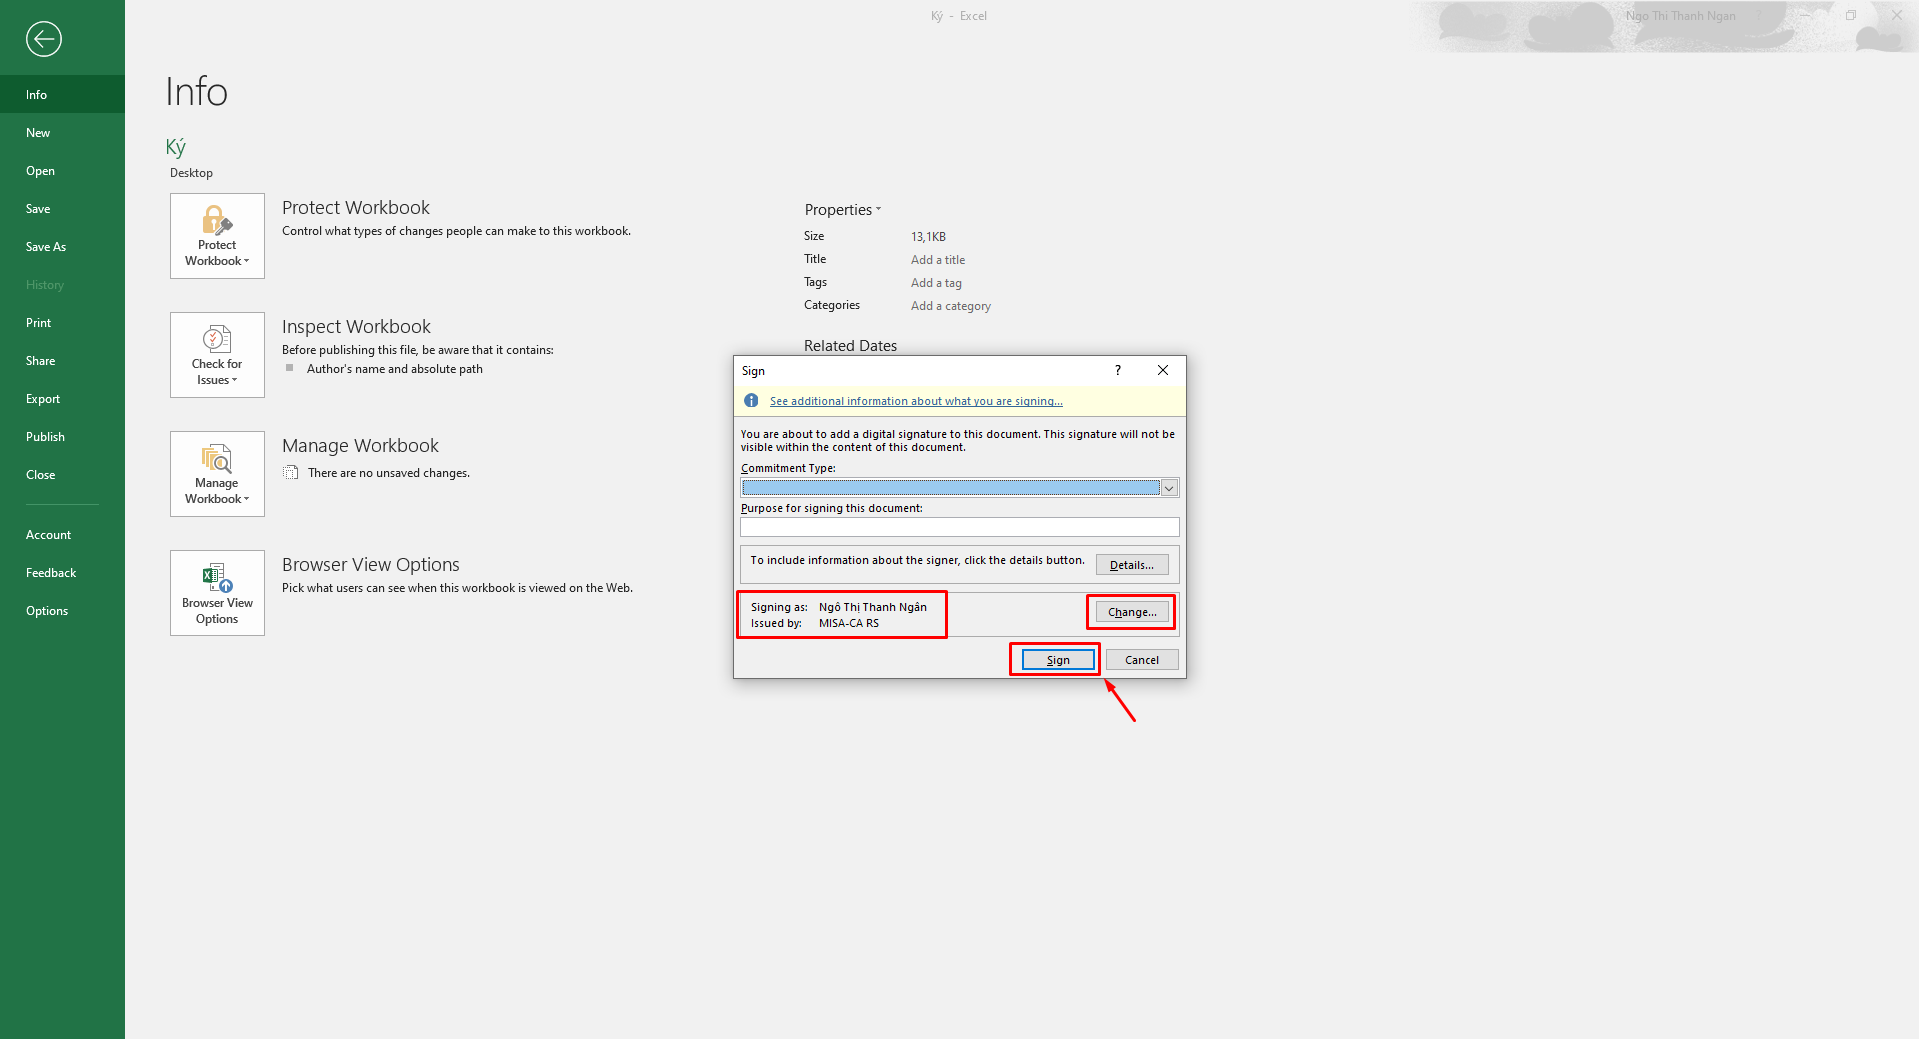
Step 5: Verify that the displayed certificate is correct.
Step 6: If you want to change the certificate, select Change.
Step 7: Click Sign to start signing.
Step 8: The authentication waiting screen will appear.
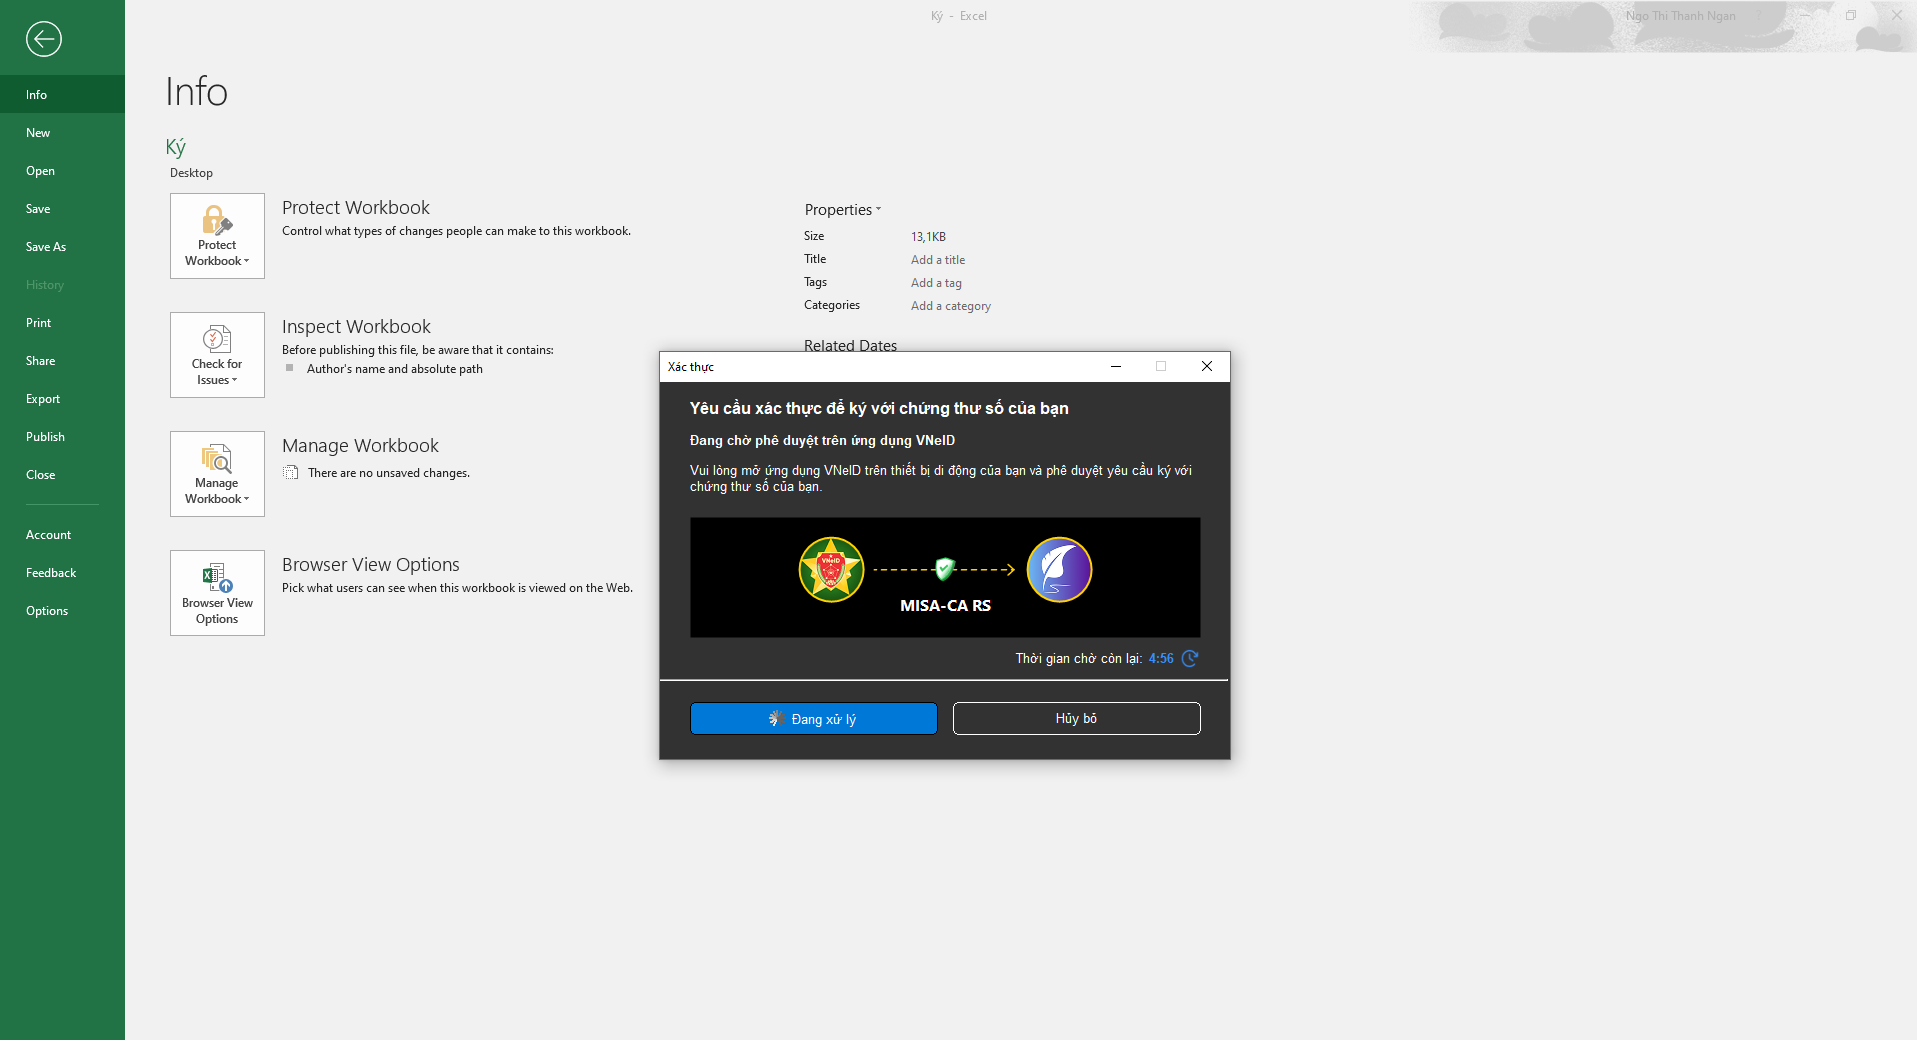
Step 9: Open the VNeID application on your mobile device.
- Go to Notifications → Select Digital signing request.
- Check the information.
- Agree to the terms:
- “I have read and understood the purpose, rights, and obligations...”
- Click Confirm sharing.
- The app displays Information shared successfully.

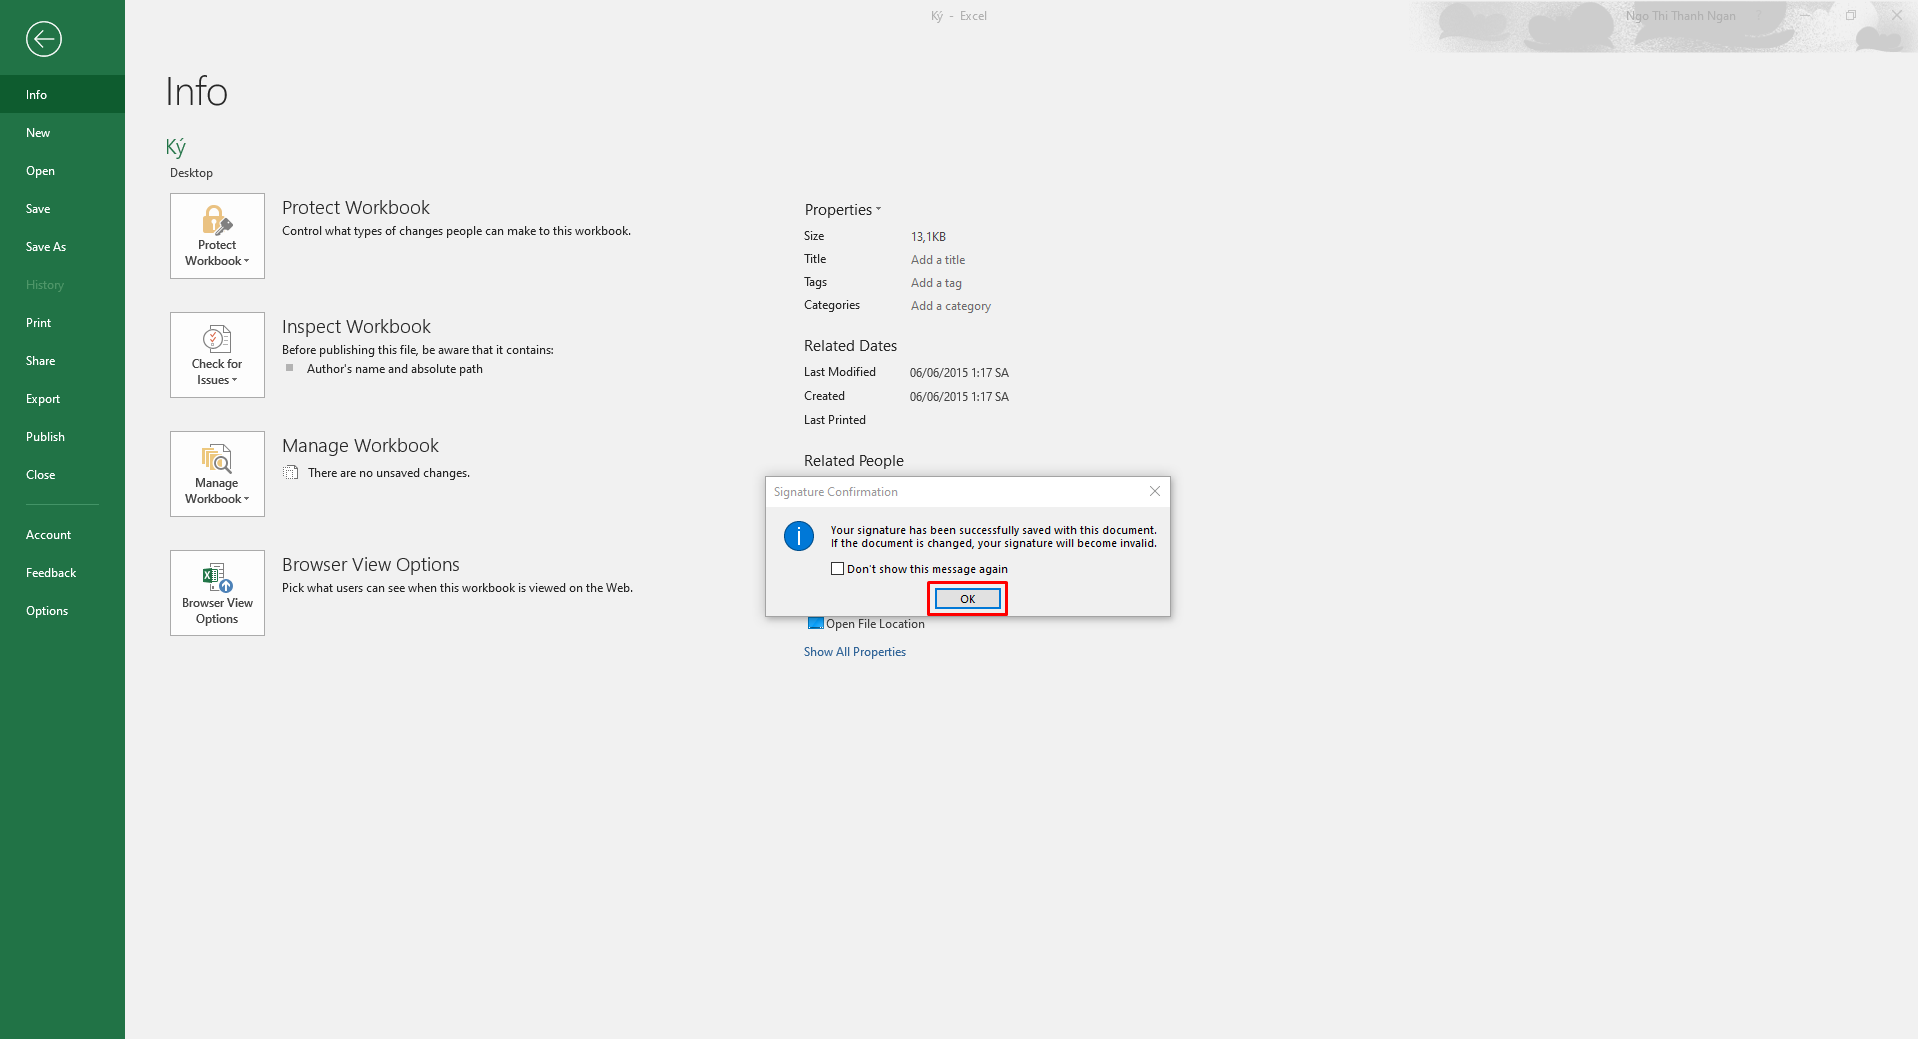
Step 10: Complete the signing process
- “Signing completed successfully.”

Step 11: Check the signed document.
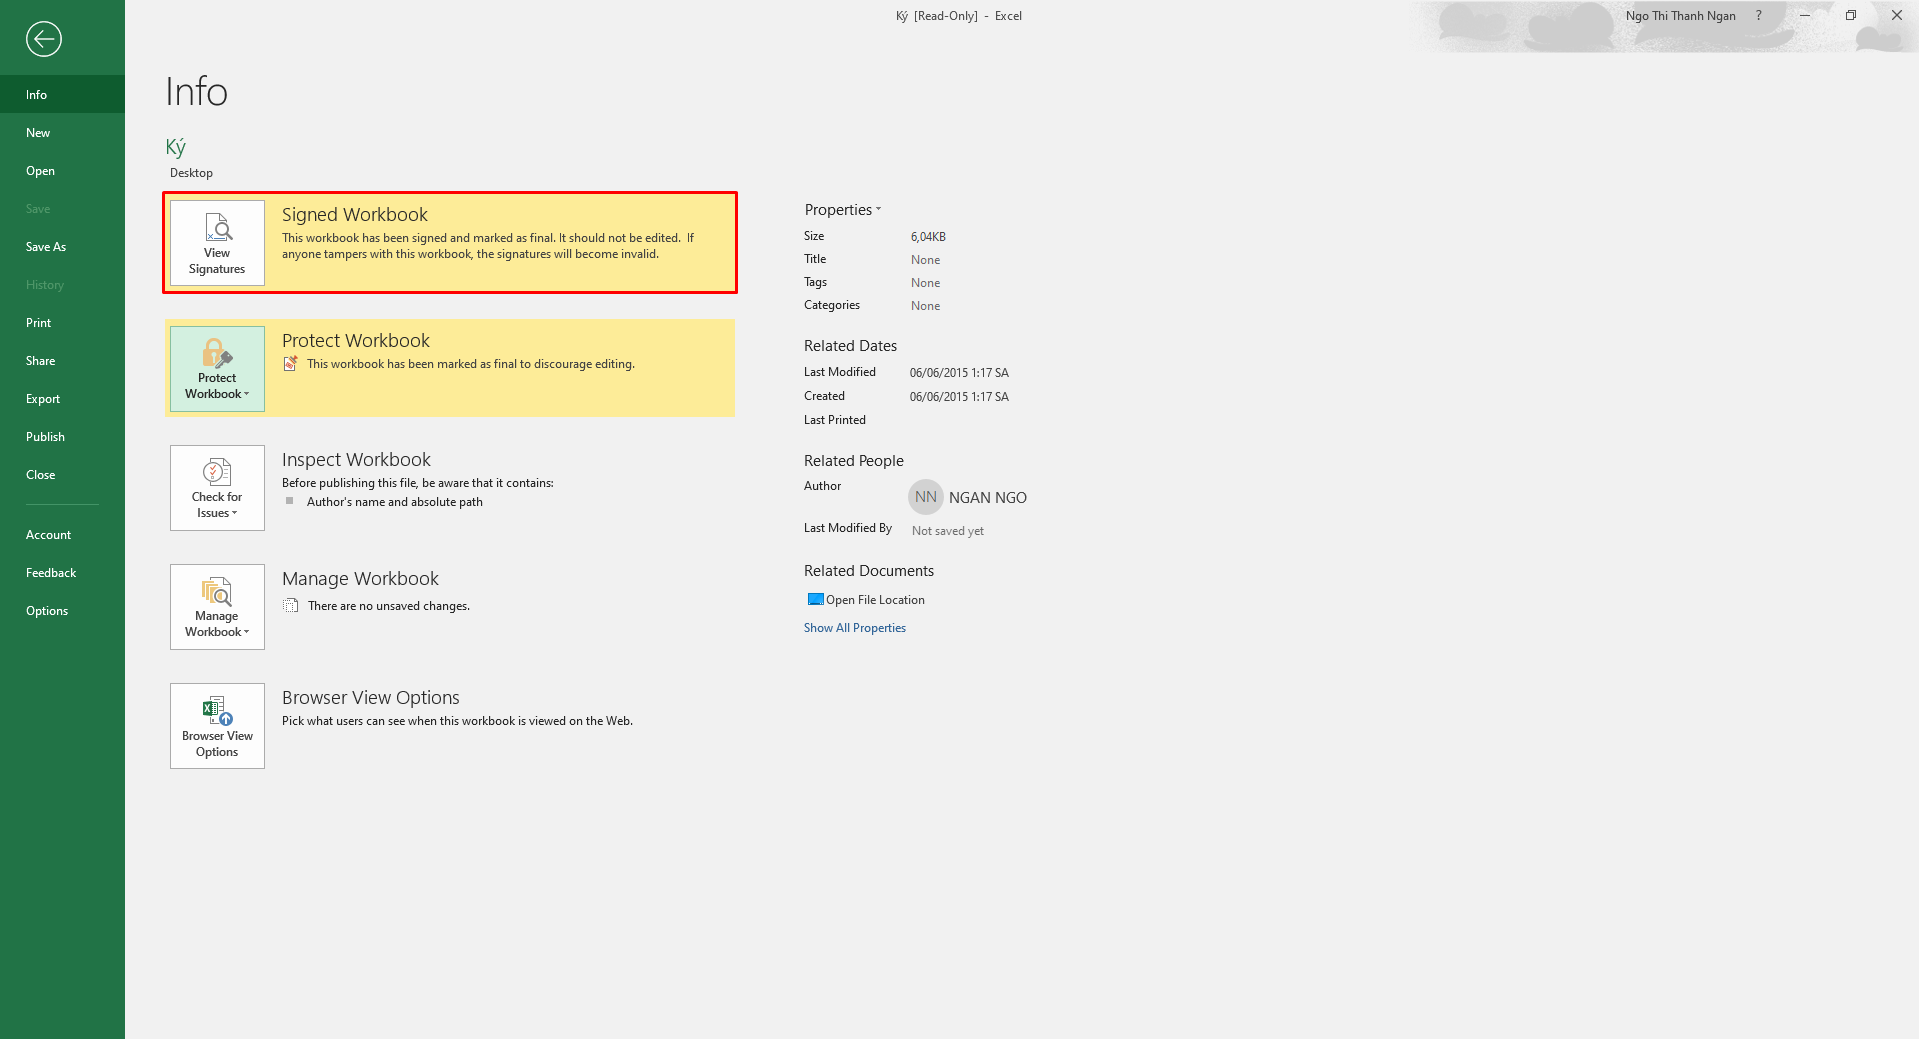
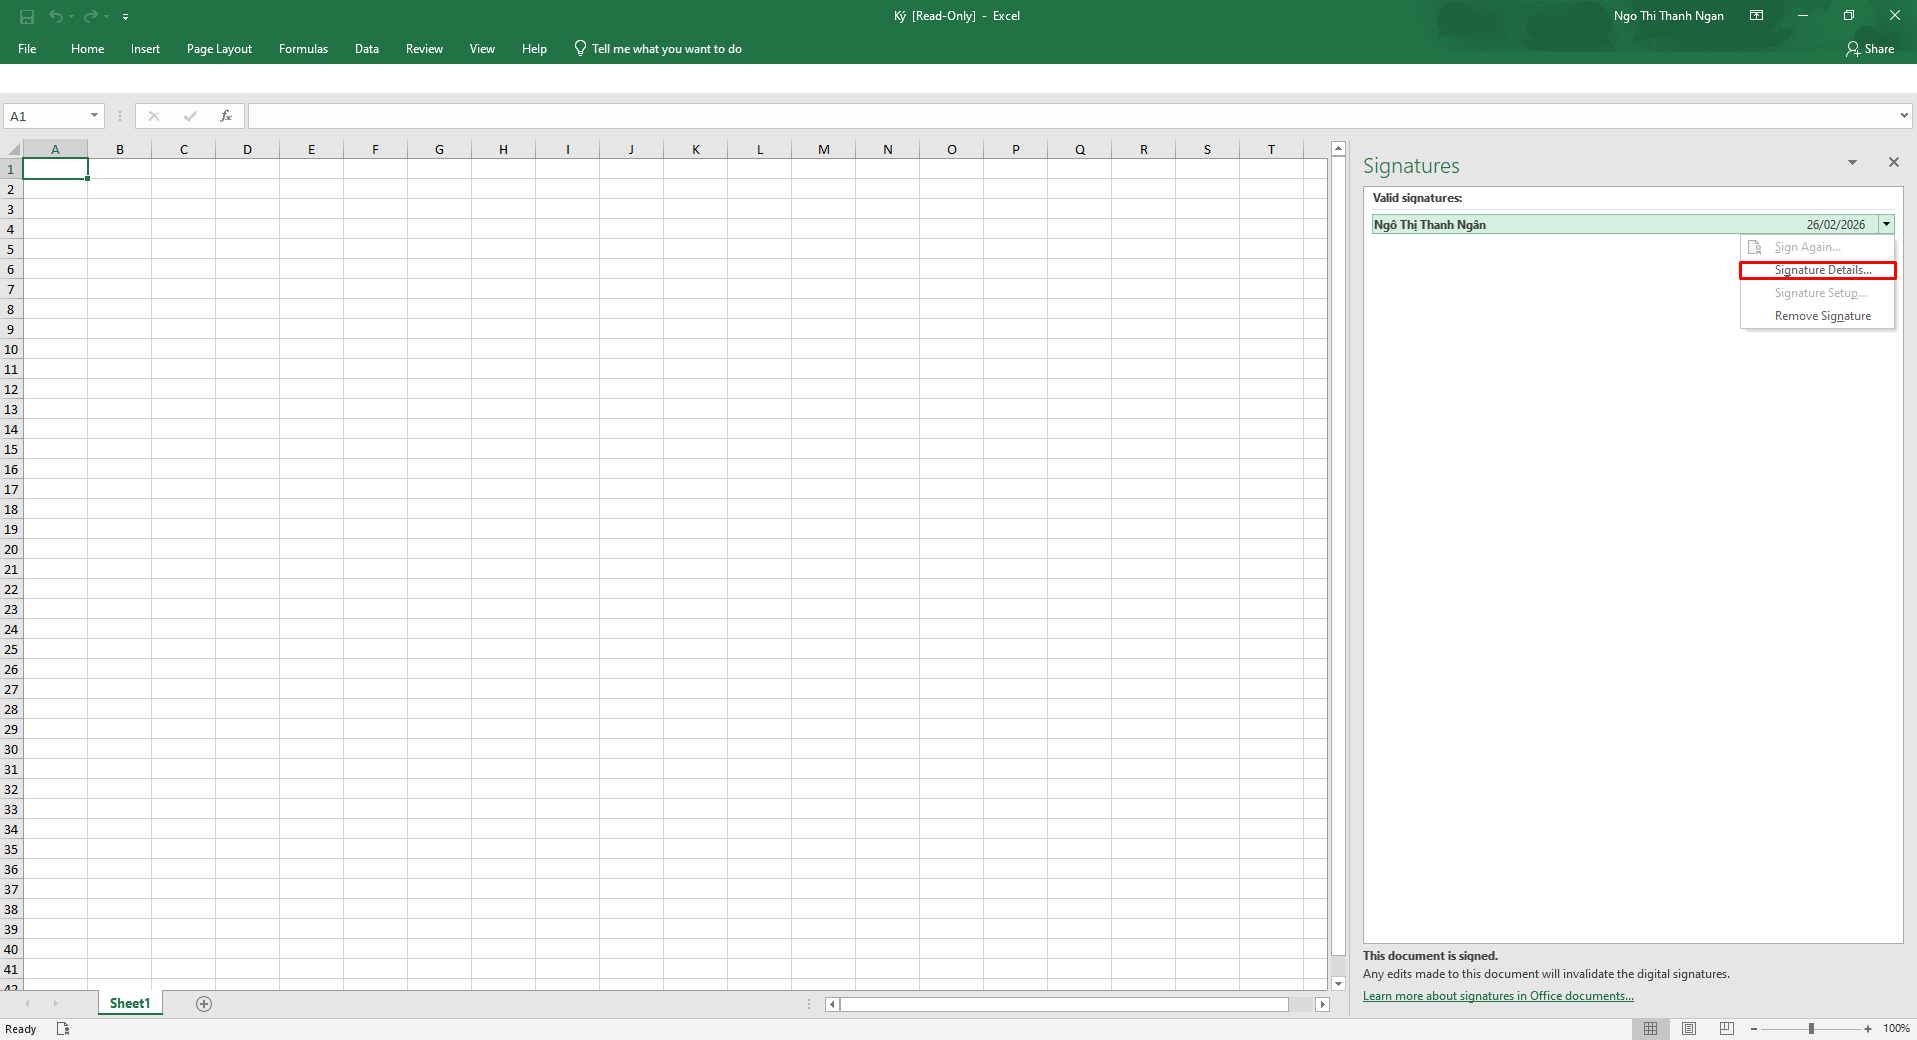
Step 12: View certificate details.
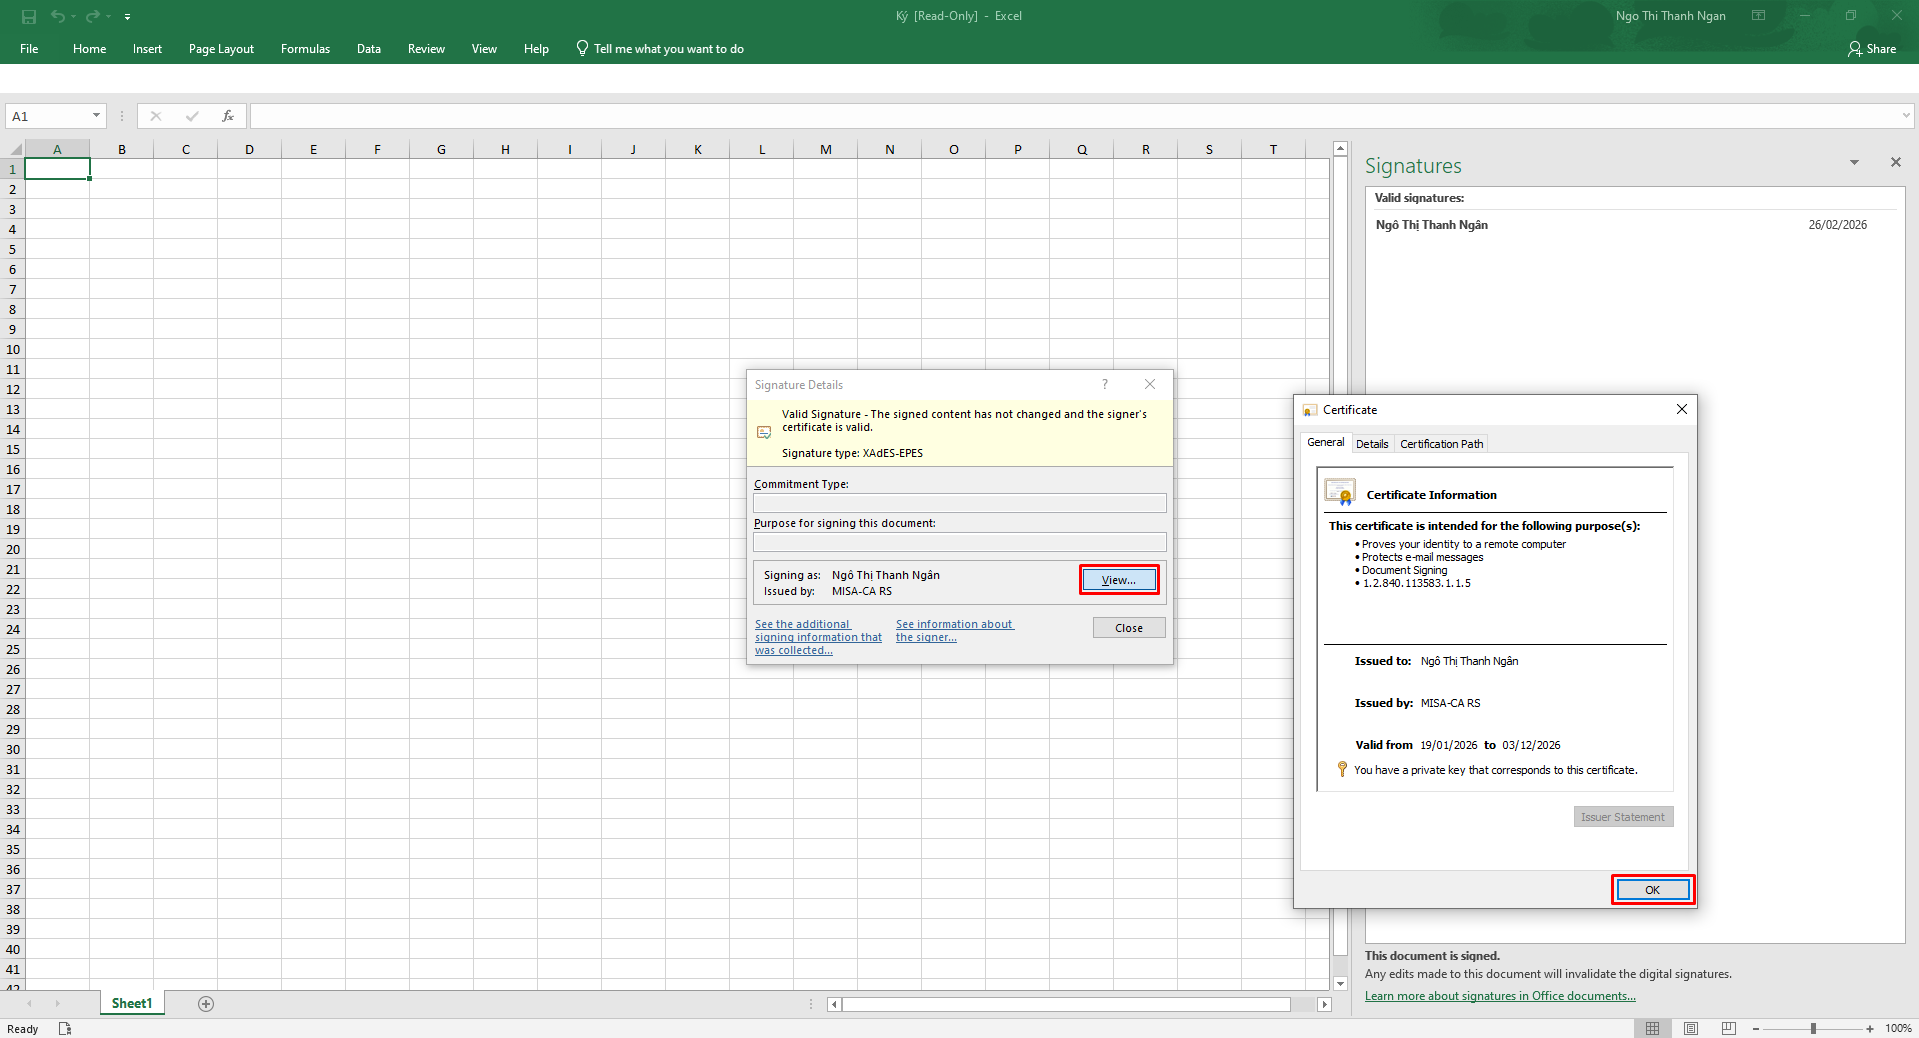
To view certificate details:
- Click the expand icon
- Select Signature Details
- Click View to see details
- Click OK to finish
PreviousSign with Microsoft Word
NextSign with Microsoft PowerPoint